Making blog

I finished up all the assets so I could start animating.
I love Ruths idea of a pair of shoes that will cool your feet when they get too hot. I lived in a much hotter climate than the UK when I was growing up and these would have been very useful.
To begin coming up with ideas I first split the design of the Pumper Footer into 2 parts and asked myself these questions:
- How will the shoe collect the air?
- How will the shoe distribute the cold air to different parts of the foot?
My first idea was to make a shoe which has an area or void that fills with air as you lift your foot off the ground and then, using the weight of your body, distributes that air through hoses to different areas of your feet. Maybe these could be movable, or designed so that you can choose to cool different parts of the foot more than others (some people might have sweaty toes, some sweaty heels)
You can see on my first drawing I was thinking of them working a little like the foot pumps you can get to pump up airbeds or paddling pools.
I thought this solution would work but it occurred to me there were still some ways of improving it.
The problem with this first design is that once your feet have grown then you'd need a whole new pair of pumper footers, and if the shoes themselves were worn down then you couldn't even pass them on to someone else to use. So I wondered if there was a way we could make them less wasteful.
The next drawing is my idea for a more reusable solution, allowing you to attach Ruths Pumper Footer device to lots of different shoes. This means when you get new shoes you can switch the device to them, you would also be able to lend this design to friends or family if you're not using it yourself just as long as they have installed connection points on their shoes.
How it functions:
- The device sits around the back of your ankle/lower leg and attaches with straps.
- The top is made up of lots of funnels at different angles to best collect as much of the air passing over the top as you are walking.
- The air is stored in the chamber underneath the funnels where it can also be cooled if it is too warm.
- When the chamber is full the air is forced out through the distribution hoses by a plunger.
- The hoses attach via nozzles to connectors installed in your regular shoes.
The connection points would be installed into your chosen shoes, the benefit of this would be that you could choose where you would like them to go. For example if you’re wearing trainers you might want cool air in different places than if you’re wearing wellington boots.
When your shoes are worn out these connectors can be removed and reinstalled in a new pair and in the winter when it's cold you don't have to walk around with the whole pumper footer on but you can still wear your favourite shoes!
When I work on a graphic design or advertising project one of the first things I sit down and do is collect anything and everything that comes into my head. Sometimes it’s difficult to know where to start. My notes and drawings can be pretty messy and cluttered but my aim is to get ideas down and then edit/filter later.
With the Rainbow Running Ruddocks I wanted to start to build an idea of the options for how an advert might look. Gathering some old sports shoe ads I noticed that they have a similar style to Ava’s design - drawing attention to certain aspects of the show design.
I also came across some visuals that I liked the look of - bright, colourful, Pop Art style.
A lot of how the ad will look will depend on who Ava wants the shoes to be marketed towards.

So far I have been making a few mood boards for each asset that I need to make.
I have mainly focused on the rubber glove model and explored what the friction ball may look like.

I used the software Autodesk Maya to model the tree, and some basic aspects of the environment, like the clouds and the moon for the night time scene.
I followed my drawing fairly closely, but definitely wanted to do something special for the leaves as they're the most important animation in the video.
I decided to model and rig a leaf that would uncurl itself when the sun comes up, so it can open up to collect the solar energy! I did this by making the leaf shape, and then rigging it with some joints that allowed it to bend in certain places. I kept it quite geometric to give it a more mechanical look.

I loved the way Honey drew the Power Tree, and the lovely colours she used caught my attention, and I really wanted to make it!
I thought it was a very smart idea, and one that I can definitely see being produced in the future. I liked that it was both good for the environment, and also has a lot of design possibilities.
I wanted to make her idea into a 3D animation that loops, and shows how the tree responds in different types of weather, like in the sun, night time, and in windy weather. I began sketching out my designs in Photoshop so I could then use them as reference when it came to modelling. This is one of the most important parts of the project, as it gives me a really good foundation to work from when I start making it in 3D.
Woah, Roxanne's idea is super cool! I would love to live in a future where all of our electricity came from solar animals! I'm going to make a 3D animation so we can see what that might look like.
What I will make:
I will make a virtual film set which goes through how Solar Tron works (1 scene, maybe split into a couple of shots)
Solar Tron moves into the shot, stops centre frame.
Some kind of indication that the sun is beating down on Solar Tron (i.e. wiggly lines)
The sun goes down. Night time.
The Solar Tron glows to show it has full power
Energy is released into the houses and the lights turn on in the houses.
Solar Tron exits frame.
Sun comes up to create a looping animation.
Thoughts:
In the original design the Solar Tron walks around to collect sunlight. I think that if this were to work in the real world the design will need to touch the wires in some way to create a connection to the houses. I am wondering whether I could possibly do this with some kind of rail track like a train or a tram.
The original design from Roxanne is amazing, and looks so much like a fox already, so I'm going to try and stay as close to that as possible.
Style:
I won't be aiming for a realistic CGI model but a slightly more stylised approach like the following:
Robin: https://www.littleinventors.org/ideas/fuzzy-pj-fun-dress-up-spacesuit/details
Chloe: https://www.littleinventors.org/ideas/robot-water-blaster/details#tangible
Making of:
At regular intervals I will take a screenshot of the process to make a making of.
Every so often I will cut into screen recording of the 3D software where you will be able to see what I'm making in more detail.
I’ve recently been looking at branches and solar panels for the power tree!
Branches –
After a little experimenting, I found I could make tubes for the branches by thermoforming sheet plastic.
Thermoforming, is where you heat plastic to make it bendy and hold it in a new shape. When it cools it stays in the new shape!
To make branches, I needed to find just the right thickness of material – thick enough that it will be strong, but thin enough that I can roll it into tubes. I found rolling the tubes like they roll paper straws made them very strong.
Next, I have to decide how to best join the branches!
Solar Panels –
I want the power tree to generate a useful amount of energy – so I’ve found small solar panels I can use for the leaves. To help me choose the right solar panels, I worked out how much power each one would give, and how many solar panels I thought the tree should have.
I bought some panels to test and found that the amount of power the supply varies a lot depending on the time of the day, and how bright it is. I, therefore, decided I need what is called a “buck/boost convertor”. This takes a varying power source, and creates a constant voltage – this can then be used to power things.
Next I will have to decide what to connect to our power tree! I could possibly add a battery, so we can store the power when it is sunny, and use it across the whole day.

I've modelled some more assets for the world, that of which include; the toilet (and user), the drone and the wind turbine.

Now that I have the 3D sketch, and I know the rough area of where to place the models, I started modeling the generators and mechanical bug.
I wanted to stick to the colours that Ethan had used in his original drawing. On the Bug, I used the red in select areas where there were indents and help separate the green. I also kept the stripes on the wings with a little twist.

I was really intrigued by Ethan's Idea of poo powered invention. Especially since it generates multiple sources of energy from a single source!
To start off, I drew up a quick side view sketch to get an idea of how it was going to look. I then Started to model a 3D sketch, which is where I use basic shapes to see the proportions of the models and get an idea of where things need to be.
I absolutely love Ruby's idea - I was tickled at the idea of 'mams and grans who like to chat' generating electricity! I know when my mum starts chatting there is no stopping her - imagine what she could power!! My idea is to make a video to show two people chatting wearing the devices. In my day job I'm an animator so I think I will make the characters as models and have their jaws moving to show how the invention might work. When I started thinking of how the jaw might move I thought of clockwork toy chattering teeth so I'm going to see if I can work similar mechanics into my models of the two characters. I've bought a pair of chattering teeth to see how they work!

In the times before Covid-19 lockdown...
I started looking at Honey’s amazing Power Tree idea. It has so much potential, I was really pleased to get the chance to try and make it real.
I was initially thinking about how it could be a huge, power generating tree or a smaller, desktop charging device. I realised the thing I make could help us explore both of those possibilities.
I decided to explore how we could make the power tree generate electricity.
Honey’s original sketch has leaf shaped solar panels. I found that solar panels can be made into lots of different shapes, although they are only readily available and mass produced in squares, rectangles and circles. This means I will have to think about how we can use standard solar panels to make leaves.
One of the aspects of Honey’s original sketch, I really liked was how she sectioned the tree so we could see the wires inside. We often do this with drawings and sketches when designing things, to help us explain how things work. For the make, we can achieve a similar effect by making the branches clear, showing colourful wires travelling down the branches to the generator.
I was also thinking about how a large power tree would probably be made from tubes like a wind turbine, using as little material as possible.
So. For the power tree model, I’m going look at transparent sheet material, rolled into tubes.
I then wanted to know what a tree would look like made from tubes, so I decided to make some prototypes. Prototypes are early, less detailed versions of the thing we’ll finally make. They can be as simple as a sketch, or almost as complicated as the final thing.
I initially made a computer model where all the tubes were the same size, with a repeating pattern (each branch splits twice). I think this shows that with enough branches and panels, we can make quite an interesting looking tree. I then made a paper model, where the branches/tubes get thinner as they get longer. I also thought this worked quite well.
At this stage, I thought it was a good idea to bring what I’d be looking at into the Octo Design Studio, to share with the team.
There were lots of good ideas to help me make Honey’s ideas. I particularly liked the idea of using an existing plant pot as a base, and how we could create the generator in the trunk of the tree, like Honey’s sketch. I’m hoping to add something to the generator that will show when the tree is generating electricity.
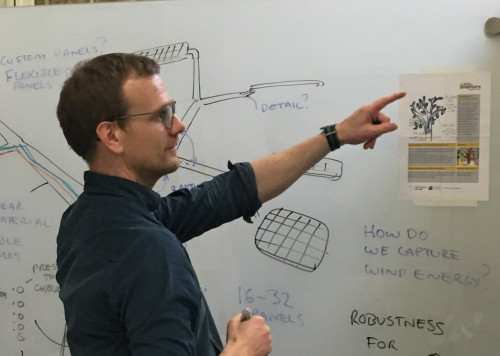
Reviewing Honey’s idea in the studio, was actually the last thing we looked at as a team in the studio before the lockdown. I believe it’s still on the whiteboard now!
Since then, I had to focus a little bit on getting things setup to work from home, but I’m now moving things forward again. I’ll save those developments for another blog post!
